Redneck Rope Trick, and Test Rides

A month or so back my Honda CB650 went on the disabled list, owing to the fact that the oil spray from the leaking cylinder head was messing up my work pants.  I looked into retorquing it, as I had done to the XS650, and saw that it was a much bigger job AND that many more experienced CB650 owners didn’t think it likely to work.

Gah.

But in the process of searching for a solution, I ran across this one guy on this forum who said his solution wasn’t to fix the leak, but to stop the spray.  He shoved nylon rope (so he said) into the fins, blocking the cylinder head joint; oil that sprayed out was thus caught by the nylon rope, which he would replace from time to time, and his pants and shoes were kept clean.

Now, nylon (or poly) rope doesn’t have that high of a melting point, but I know from experience that natural fibers can actually take quite a lot of heat.  So I got a roll of sisal twine (not actual rope) at Wal-Mart and ran six wraps (really, three wraps of doubled twine) around the engine at the base of the cylinder head.

I’m calling this the Redneck Rope Trick.  Not saying the original guy was a redneck, but I am, so there you are.

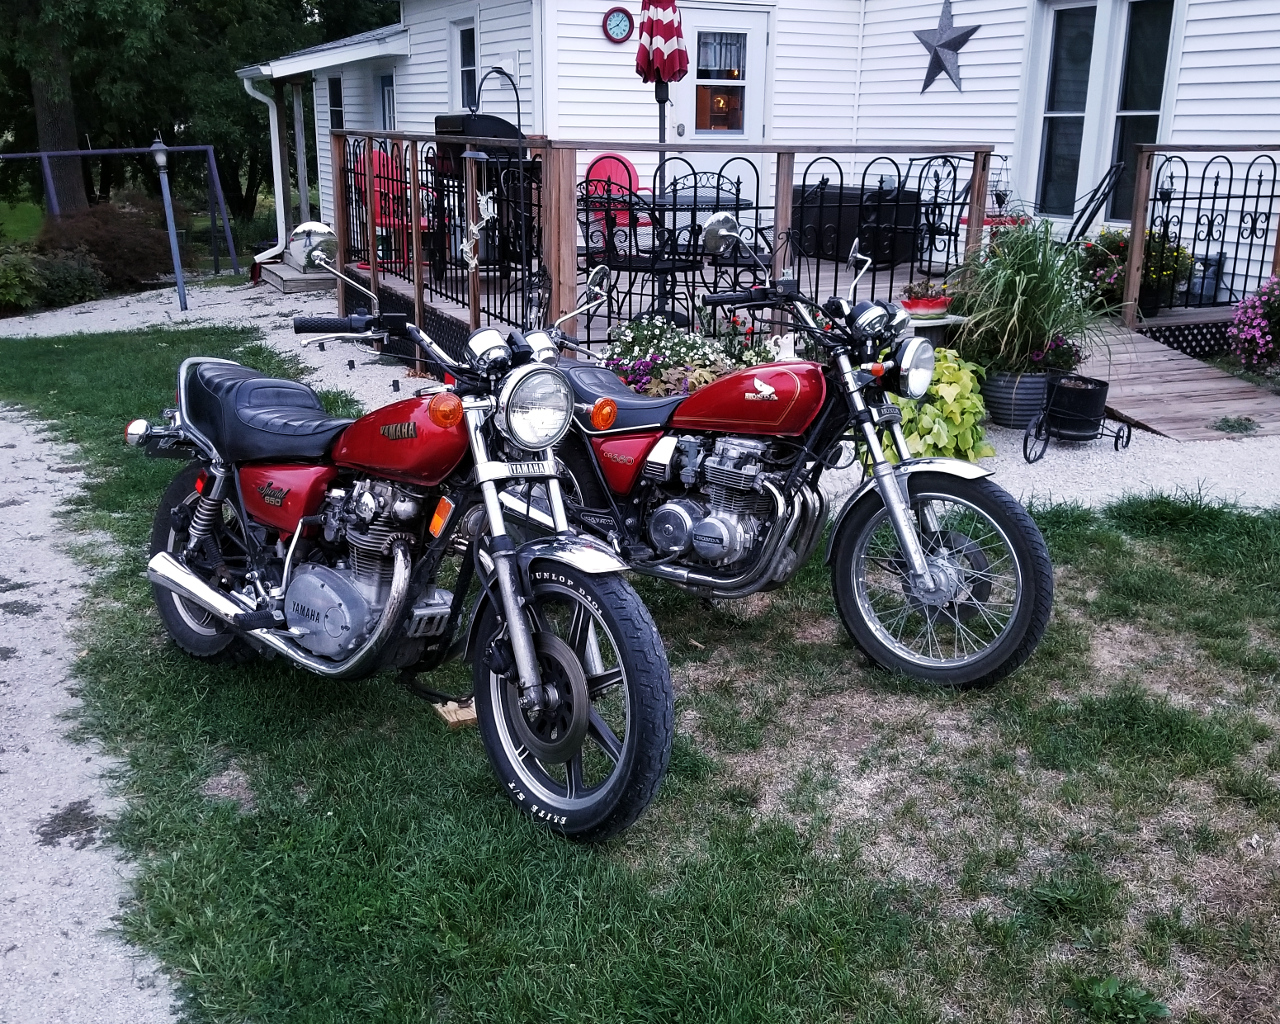
So tonight, having done this oh-so-technical fix to the Honda, I decided to take time to test ride both my 1980’s.

First I did a 33.6 mile loop on the XS650, running the Deer Ridge – Irish Ridge road.  Saw some deer, didn’t hit any.  Burned 0.6 gallons of gas, so 55 MPG or thereabouts. Still no oil weeping out of the head… perfect!

Unfortunately, when full, gas weeps out of the gas cap. Guess I need a new rubber washer for that.

Also, the aftermarket mirrors from 2FastMoto I put on are crap. I really want a set just like the ones on my Honda CB650, so it’s off to eBay to see what I can find.

Next I took the Honda out, running over to Knox City, then north to Colony, a couple of my favorite roads.  Coming back down toward La Belle from Colony, I turned off and took Deer Ridge to Midway, then instead of continuing on Irish Ridge I went on down to Lewistown and thence home.  About 42 miles, altogether.  Saw more deer near Deer Ridge State Park, but again, didn’t hit any.

The CB is SO MUCH smoother than the XS.  This should surprise exactly no one.  But the XS is so much nicer on city streets… it’s geared a bit higher, and doesn’t need to be shifted as much.  And it sounds GOOD, throaty and assertive.

I am the proud owner of two frickin’ awesome vintage bikes, and I could not be happier.  So glad no one could see me laughing maniacally as I whipped them down the ridge roads…

Twisted Forks

Having taken a test ride with my wife back on the 9th, I discovered the forks are twisted a bit. Long long ago, when I weighed roughly half what I do now, I owned an XL125 Honda, and if I dropped it, the forks would twist. Then I’d just roll it up next to a tree or telephone pole and twist it back the other way, and everything was fine. I haven’t tried it yet on my XS. I asked for and got advice on the forum, but the advice kind of wandered around a bit.  I decided to turn the upper fork tubes 90 degrees to the right, which theoretically should reorient the bends “out” rather than “back on the left, forward on the right.”  Then the axle should pull it all back together.

Short answer is, it almost worked.  The front was quite a bit straighter, but still annoyingly bent to the left.

So I rolled it up to a telephone pole and straightened it… and all was perfect.  Gah.

After taking a longer ride, I noticed it had begun to twist again, so again I rolled up to a telephone pole and straightened it.  Not sure if it will eventually settle into place or if I’ll have to do something else.  Another 1/8th turn on the upper tubes might do the trick.

ALSO, on a brighter note:  The other day I did retorque the head and took a 20 mile loop ride. Oily drip from the left side of the cylinder. Someone on the forum counseled patience… so today, while checking out my straightening job, I took about a 10 mile loop. No oily drip this time. Maybe it’s good for a while… I can hope.

On a related note:  Purple Power does WONDERS getting black oily crud off of the engine!

Retorquing the Head

Jumping around a bit… back on the 14th I posted a question about retorquing the head on this bike: http://www.xs650.com/threads/head-retorque-and-brass-washers-question.52552/

I’m not impressed with how this forum does quotes, so I’m just going to copy and paste here. My original post went like this:

So I have oil leaking from the left side of my just-purchased XS650, specifically from the head gasket. It runs good, so no compression issue is evident. I saw this old thread:

http://www.xs650.com/threads/leaking-head-gasket.30135/#post-302298

The members there talk about retorquing the head bolts, which I have already been advised to try on my 1980 Honda CB650 which has a similar issue. I’m good with doing that, but the thread above is light on details, and I’m the sort who likes to have everything nailed down.

First of all, brass washers are mentioned, from Mike’s XS.  This the correct part:

https://www.mikesxs.net/yamaha-xs650-brass-cylinder-head-washer-oem-90210-10004-00.html

According to the parts fiche on CMSNL (which is the one I use all the time for my other bikes), there are 4 part no. 90210-10004 washers used, which according to Mike’s XS are the equivalent parts to the brass washers they are selling. But according to the parts fiche, there are also 4 part no. 90201-10131 washers, under the other four acorn nuts. Turns out these are standard steel washers and do not need replacing.  However, those nuts still need to be retorqued.

5twins replied to my question on the XS650 forum about retorquing with some advice on different washers that might work, and ended with this very useful rundown of the procedure:

“Yes, remove one at a time, clean and lube the threads (anti-seize), then torque. I bring them up to about 25 in a couple steps, then once all are done, go back and bring them up to 28. The only other bolts that contribute to sealing the head gasket are the 2 under the spark plugs and that little 6mm at the rear. The other smaller bolts in the top cover only hold that cover on. You probably don’t need to disturb those.”

JimD54 added a link to his engine buildup thread. Lordy, I wish I had those skills. He recommends 27 ft-lbs torque on the acorn nuts and 72 INCH-lbs on the little one at the rear. He says 14 ft-lbs on the other bolts, but the diagram he included shows 16 so I’m not sure what’s best there. 5twins didn’t weigh in on the torque for those either. Yamaha’s manual says 16 ft-lbs, so I suppose that’s the answer, and the little bolt at the rear calls for 7 ft-lbs; if I haven’t messed up the math, 72 in-lbs. is 6 ft-lbs, making JimD54’s recommendation pretty close to the manual.

SO at the moment I’m planning on going with this:

Studs/acorn nuts 28 ft-lbs
Bolts under spark plugs 16 ft-lbs
Little bolt at the back 7 ft-lbs

Here’s a diagram I made to help me remember the procedure.  I printed it out and stuck it up on my parts shelf with magnets, for easy reference while doing the job.

[​IMG]

As you can see, I’ve revised the diagram from the Yamaha manual, reorienting it so front is down (as JimD54’s diagram is in his thread). I’ve numbered just the bolts/nuts that got attention, and included the torque measurements I chose after all the discussion I read and participated in on the forum.

… and now the job is done.

I don’t think the retorque has fixed the oil leak. Maybe, maybe it’s slowed a bit, but not stopped, nor even slowed as much as I hoped. Gah. Retorquing the head was a lot easier than I expected though. I can’t really tell if the current leak is actually the head gasket, or if it’s the base gasket, as there is so much oily crud from the head gasket to the base gasket on the left side of the cylinders.

It’s LEGAL!

Resoldered the turn signal switch. No pictures, because (a) it’s an ugly job of soldering, and (b) I was too busy exercising my vocabulary to take any pictures.

Next, I hooked up the new master cylinder and bled the front brakes. I pulled the tank to protect the paint, and while I had it off I looked over what retorquing is going to involve. Decided I didn’t have enough time to do that too (work, you know?) but I did have time to get the bike inspected:

[​IMG]

I checked the oil before starting out; it’s about halfway between the lower and upper lines on the dipstick, and I only had to go a mile to get to the inspection station. There was a fresh thin trickle of oil from the left side of the cylinder when I got home, so I won’t be taking any long trips until I get the retorque done. Maybe soon.

I did notice that the bike is very stiff shifting down; shifting up is pretty smooth when it’s rolling, but it’s a bear to get into neutral. I did set the free play at the clutch when I put the new bars on, and while the clutch is very stiff it does seem to disengage fully.

Just Did One Thing

Okay, so I did a little bit today. Doesn’t look like much…

[​IMG]

That’s the new brake light lead I made to connect the “generic” master cylinder to the XS650’s wiring harness. After I took the picture I installed and tested it, and it’s perfect. Also hooked up that floating ground wire.

SO now here’s my list of must-do’s before I can get this beast inspected, licensed, and on the road:

— Drain, refill, and bleed the front brake;
— Resolder the turn signal switch and reassemble the left pod; and
— Retorque the head, installing the new brass washers along the way.

I have everything in hand needed to do the first two jobs, but do not have the wobble extension needed to retorque the head. I’m hopeful I’ll get all of this done next week, after a trip to the store this weekend to get that extension.